


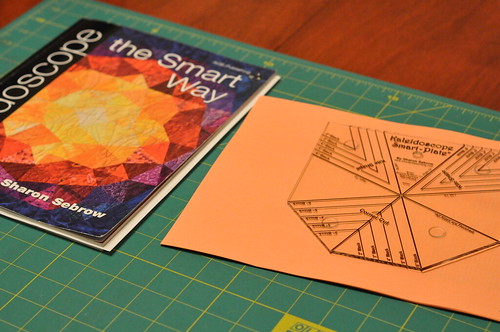
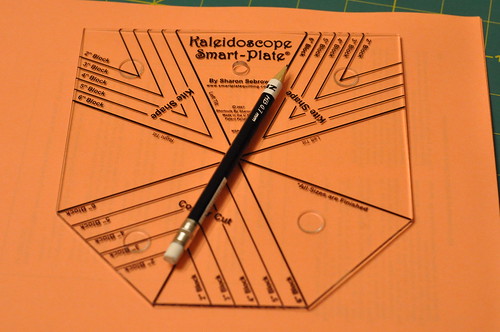
This is the Smart Plate ruler. It allows you to make kaleidos from 2 to 6 inches (finished) in size. The blocks for my quilt are 6" blocks. This ruler lets you make 12-piece blocks and 8-piece kaleido blocks. I'll show you a 12-piece block, since that is what is required for my current project. If you are looking at the writing right side up on the ruler, you can see it has a flat top (see the pencil), flat sides, and three angled sides on the bottom.

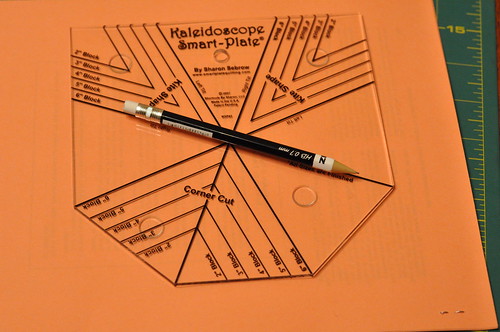
There are two straight lines on the ruler that are used to place the ruler properly (see the pencils).
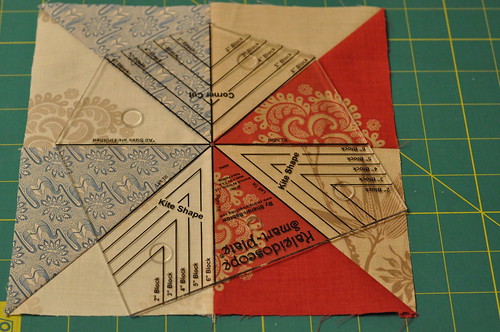
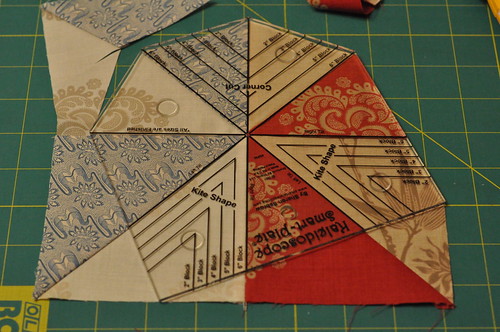
The construction of the kaleido block using this ruler requires that you begin by making a pinwheel block out of HSTs. There is a chart with the ruler that tells you the size of the HSTs that you need to make, in order to end up with the right-sized kaleido block. In my case, I began with 4 7/8" squares, made HSTs out of them, and then joined them to make a pinwheel. To turn the pinwheel into a kaleido, I place the ruler on the pinwheel block, aligning the straight lines on the ruler with the seams of the pinwheel. The flat side of the ruler is nearest to me.
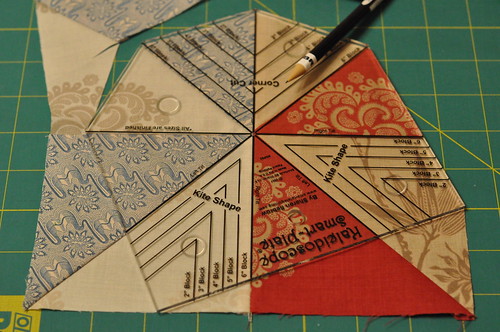
Since I am right-handed, I use the rotary cutter to begin cutting away the fabric from the right, cutting as far as I can around the ruler.
Not being Elasti-Girl, I won't be able to cut all the around the ruler without turning the block. In the photo below, the pencil is pointing to the fabric segment that will be closest to me when I rotate the block.
Now I have rotated the block, with the tan fabric segment nearest me. The ruler is placed again with the flat side nearest me, and the flat edge of the ruler is aligned with the edge of the fabric. The straight lines on the ruler are again over the seams of the pinwheel block.
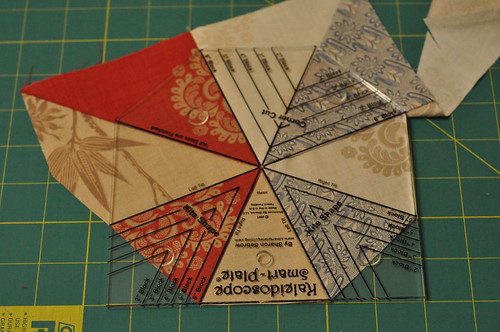
This lets you finish trimming the fabric around the ruler.
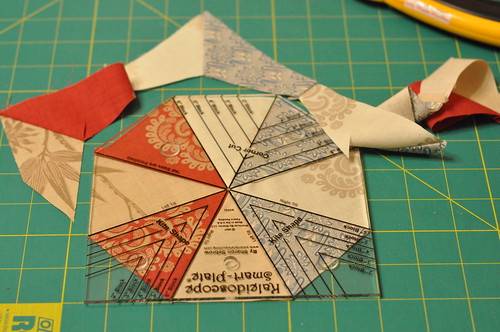
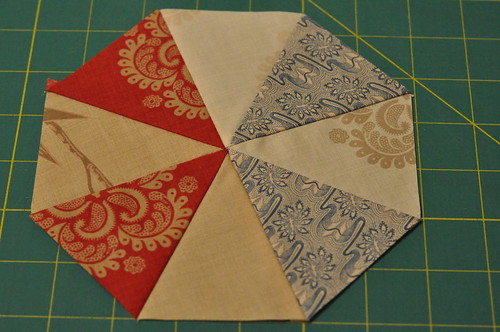
You are now ready to add the corners. For a block that finishes at 6", the chart says to use 2 5/8" squares cut on the diagonal.
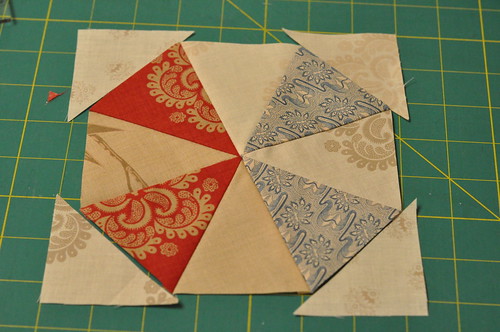
Press and trim.

Whew! If you stuck with me through all that, you might want to know what I think of the Smart Plate. The verdict is positive. There's no way to make the kaleidoscope block a fast sew-up, no matter which technique you use. There are twelve pieces in each block, for goodness' sake! For me, the most aggravating part is trimming those HSTs to make the pinwheels - that takes forever, as you know. It's mindless and time-consuming, and you don't feel like you have very much to show for all your time. But that is a feature of HSTs, not this ruler, which I find quite effective. There is a larger size available that allows you to make blocks up to 12", but it wasn't carried by my LQS. I think I would have bought that one if I had had the opportunity. The other ruler that I have is one that allows you to cut fabric strips without trimming inherent in making HSTs. However, if you are a cutter who doesn't always manage to get things absolutely square all the time (like me), the Smart Plate may be the kaleido ruler for you. Nevertheless, I will be using the other ruler for my next project, and I will be able to make a comparison of the pros and cons of each.
EDITED to add: Some of the comments about wasted fabric made me go back to the chart of sizes to double-check, and I found that I was indeed making my HSTs too big - in fact, I was using the size needed for an 8-piece rather than a 12-piece kaleido block (fewer pieces mean each piece has to be bigger). So I should be using 3 3/4" squares to make my HSTs, rather than the 4 7/8" size I have been using. Doh!


9 comments:
How smart! I've been loving all these blocks and I love a good ruler too. Thanks for the step by step...
Jennifer :)
Thanks for the detailed, comprehensible, step-by-step instructions, Lesly. You've convinced me that if I ever make a kaleidoscope quilt I should start with charm squares.
thank you for this making sense to me! I think it's something I'd like to try in the future now after reading through this and seeing the pictures!
awesome fabrics!
I'm trying very hard to convince myself that I don't need one of these for the kaleidoscope quilt I'm planning in my head.
How cool! I noticed there's quite a bit of fabric waste at the end of the process but I suppose that's the tradeoff for convenience.
What an interesting ruler! I must admit it does look like it makes light work of the block, but I wonder how much fabric one wastes with this method...just wondering.
The waste wouldn't bother me unless I really loved the fabric. After all, it's a way to work through my stash faster :-)
This was fascinating. Thank you for taking the time to do the photos!
Your demonstration was great. Thank you. I'd love to share a tip. if your HSTs are good enough to piece the pinwheel well at the center, you don't need to square them up at all. If they really need to be squared, you only need to square the corner that is the center of the pinwheel.
As for waste, the smaller HSTs would have left less waste. If you are making the 8-patch version the triangle trimmings can be pieced together to make a scrappy border.
sharon sebrow - inventor / author
Post a Comment
Thanks for dropping by - I'd love to hear what you think, so please leave me a comment!