My first wonky improv

/ Sunday 31 January 2010 /
This weekend my husband and daughter have been in Montreal, so I figured it would be a good time to finish up my January commitment to the Maple Leaf Bee. Quilting Barbie asked for a wonky log cabin and an improv block, to make a quilt for her toddler son's big-boy bed. She sent us some beautiful fabric in oranges, blues and aquas. I've been putting off making them because I've never done wonky or improv before. But as you see, it's the last day of the month, so Time Has Run Out.
Wonky log cabin for Maple Leaf Bee
Here's a better look at the blocks. First, wonky log cabin.  This worked out okay, I guess.  It was fun to do, but I'm not sure I'm a complete fan.  The jury is still out.
Improv block for Maple Leaf Bee
Now the improv.  It was stressful in a fun kind of way.  How does one know when it's finished?  I just kept adding to it, and I felt like any minute it would get up and take over the world - at least The Block that Ate Ontario. Honestly, I think it's a bit of a hegdish, and I'm not sure I like it.  I hope Barb isn't too particular!  And of course it wouldn't be quilting if there weren't some boo-boos.  For example, the goldfish in the upper right section of the block are swimming upside down.  This is a life lesson that all children need to learn, but I'm not sure Barb wanted me to piece it into her son's quilt!  And I added some fabric from my stash, but I forgot that it was for a boy's bed, and there is a honking big chunk of lacy aqua paisley there, plus a strip of Amy Butler chrysanthemums at the bottom left (there's some in the log cabin, too).  I hope it isn't too girlish for Barb's taste - when I went back to look at the Flickr photos of the other blocks, none of the fabrics seemed to feature flowers or other feminine motifs - I'm hoping that it will all blend into the big picture.
On another note, I gave my friend her quilt last night.  She was very surprised and touched.  She cried, I cried, and her teenage daughter poked gentle fun at us.  My friend has put an offer in on a house across town and is in a fair way to making a new start.  Thank you all for your kind words.

Leave your worries on the doorstep

/ Wednesday 27 January 2010 /
Grab your coat and get your hat,
Leave your worries on the doorstep.
Just direct your feet
To the sunny side of the street.

Sunny Side of the Street on the line, originally uploaded by Shadrach Meshach & Abednego.
This poor quilt top languished in the basement for over a decade, and is finally finished! I'm calling this quilt The Sunny Side of the Street. Not only are the lyrics of that song from 1930 appropriate for the bright colours, so welcome on a drab winter's day, but the sentiment they convey are fitting for my friend, who is divorcing and beginning a new life.
Sunny Side of the Street
Can you hear the pitter pat?
You know that happy tune is your step.
Life can be so sweet
On the sunny side of the street.
Sunny Side of the Street detail
I tried some fancy stitching on the quilting this time.  Not sure I'm 100% happy with the result, but it looks fine, I guess.  Also, I really wanted a red binding for this quilt, but on reflection, I'm afraid the one I used was too dark or too intense.  I would have liked one that was a bit more orangey, but I went ahead and used what was in my stash because I was in a hurry.  But it looks okay, I think.  Argh.  Aren't we all our own toughest critics?
If I never have a dime,
I'll be rich as Rockefeller.
Gold dust at my feet,
On the sunny side of the street.
Sunny Side of the Street
I'm very, very happy to be able to give a friend a gift that will provide her a bit of comfort in her days of difficulty.  It's hard to see a friend hurting.  When you can't do anything else, give a quilt!
Sunny Side of the Street backside
And now I can move another one off the list of WIPs.  I don't have very many on that list (see sidebar) - only three now, and one is already a flimsy.  Yay for me - at least in this area of my life, I appear to be a finisher!
I used to walk in the shade
With my blues on parade.
Now I'm not afraid,
This rover has crossed over.


Updated to link to Amy's Sew-N-Tell Friday!  Go look at all the goodies!

How-to: Fons & Porter binding tool tutorial

/ Tuesday 26 January 2010 /
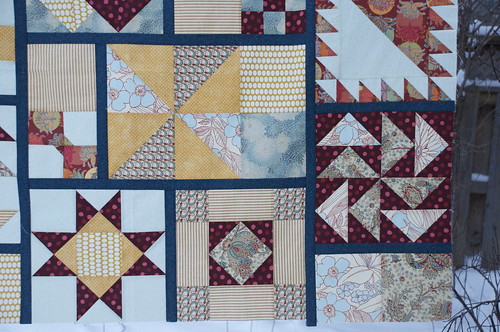
This is the reason I decided to start blogging.  When I started quilting again this summer, my first project was to quilt up a flimsy that my mother had left when she passed away suddenly in 2008.  I went to the LQS to pick up some backing and batting, and I was very interested in looking around to see what kind of innovations had been released in the quilting world over the past decade-plus.  I was especially interested in anything that made binding easier, since I harboured deep-seated anxiety about those dang mitred corners (which I've got licked now, huzzah).  The helpful LQS lady raved about the Fons & Porter binding tool as the best thing since the rotary cutter, so home with me it went.  I have no memory of using the F&P tool, although I did, since the whole experience of finishing my mother's quilt on the first anniversary of her passing was quite emotional.  It must have been charmed - everything went fine.

But shortly after that I made another quilt, and I ran head-on into a brick wall when I tried to make the F&P binding tool work for me.  Let me back up.  The binding tool is meant to help you determine exactly where to cut the binding so that you have a perfect fit, and also to show you where to mark and sew the ends together so that you have a perfect, continuous, mitred binding with no bunching.  When I was making Blue Meanies , I sat late at night trying to get that binding joined up, but each time it was twisted, and wouldn't lie flat.  Seriously, I tried for well over an hour, pinning and basting, re-pinning and re-basting, to no avail.  I moved to the internet, looking for a tutorial somewhere, and I did find one, but it was corrupted somehow, so that it stopped in the middle.  I felt sure it was just about to show me what I was doing wrong.  Imagine reading a murder mystery and when you get to the part where the detective says "And the murderer is...", the pages are missing!  Finally, at 2.30am,  I coughed up $20 to get access to the Fons and Porter site and watched their 2 minute video.  Lo and behold, there it was.  The answer.  The answer NOT printed on the instructions.  At that point I thought, I need to rant about this!  But no one in my household was remotely interested (plus being sound asleep) - thus, the decision to blog was born!
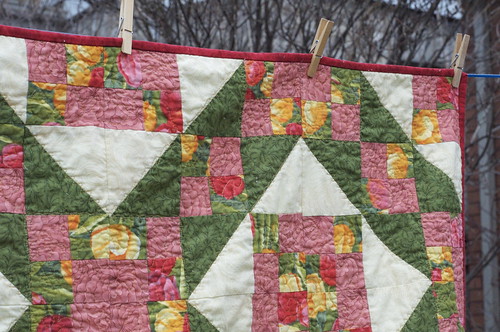
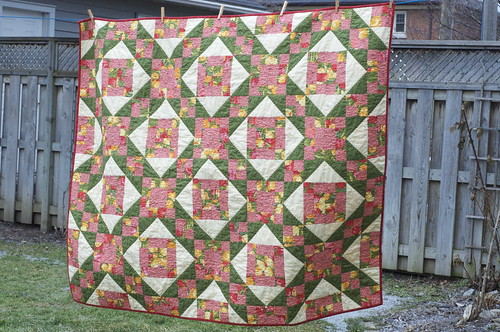
Last night I sewed the binding onto the Jacob's Ladder I'm working on, and I took photos to show how to use the Fons & Porter binding tool, which is really an excellent tool for perfectly fitting binding.  But there is a trick that isn't mentioned in the instructions.  Here are some photos of the process.
DSC_0001
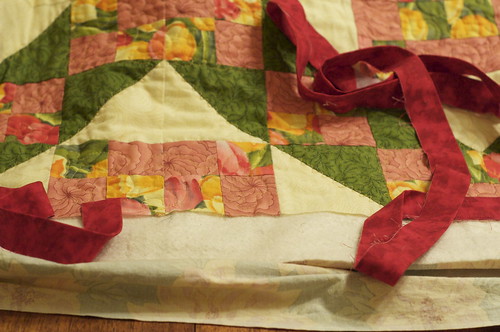
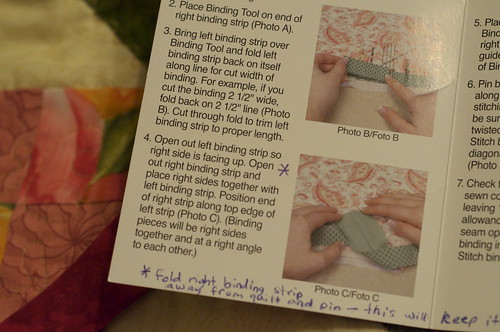
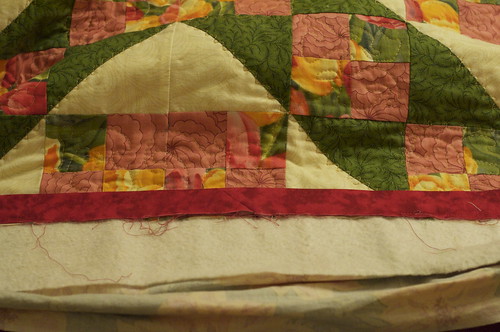
Step 1.  Leave about 8 inches unsewn at the beginning when attaching the binding, and stop sewing the binding when there is about a 12" opening.  I do not trim the extra batting/backing until the binding has been completely sewn on, but that's up to you - it makes no difference in the use of the tool.  Face the quilt so that the open spot is in front of you and the body of the quilt is on your table.  Trim the right edge of the loose binding so that it ends in the middle of the open edge.
DSC_0013
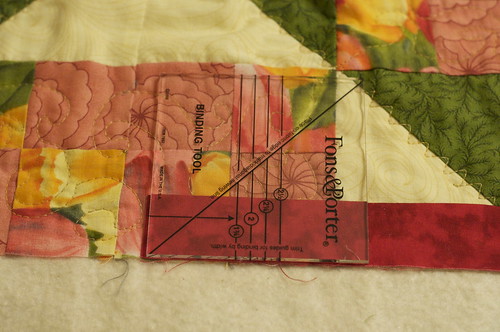
Step 2.  Lay the binding tool on the edge of the strip, so that the words "Fons & Porter" are on the right and the left edge of the tool is on the very edge of the binding.
DSC_0016
Step 3. Take the left binding strip and lay it over the binding tool.  You will fold it at the marking line that matches the width of your binding.  Mine was 2 1/2", so you can see the binding folded at the 2 1/2" mark.  Trim the binding at the fold.
DSC_0007
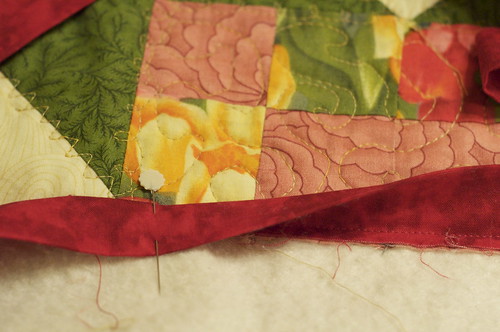
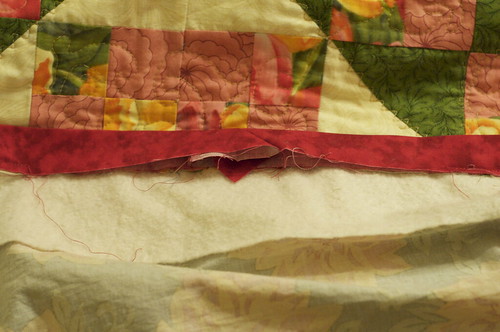
Step 4.  MOST IMPORTANT STEP IN THE WHOLE PROCESS.  The binding wants to lie flat against the body of the quilt.  But you must take the right-hand binding and fold it down, away from the body of the quilt.   Pin it where the stitching ends so that it will stay folded down.
DSC_0010
Step 5.  Write about Step 4 on the instructions that come with the tool so that you don't forget next time!
DSC_0019
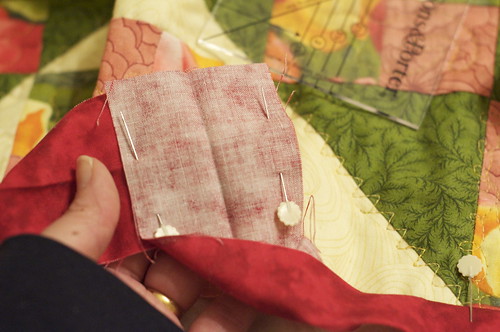
Step 6.  Open up each binding strip and lay them together, with right sides facing.  Align the raw edges and pin them together.  You will have to bunch the quilt up a bit in the open space - that's fine.
DSC_0022
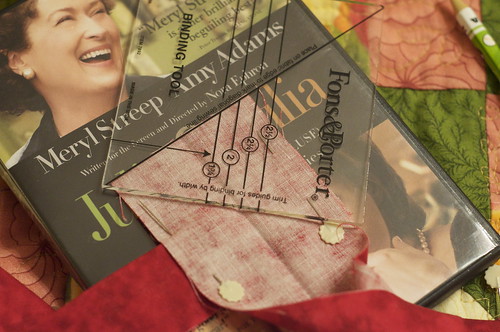
Step 7.  Lay the binding tool over the binding segments and align the diagonal line marked on the tool with the raw edges of the binding.
DSC_0025
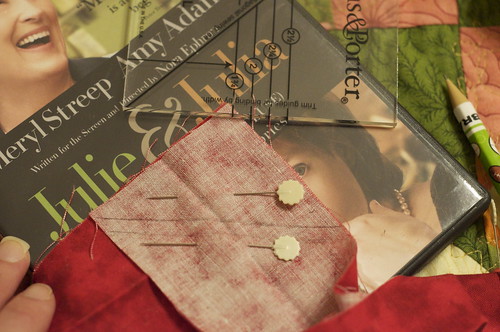
Step 8.  Use a sharp pencil to draw a line against the bottom of the tool, making a 45 degree stitching line.
DSC_0028
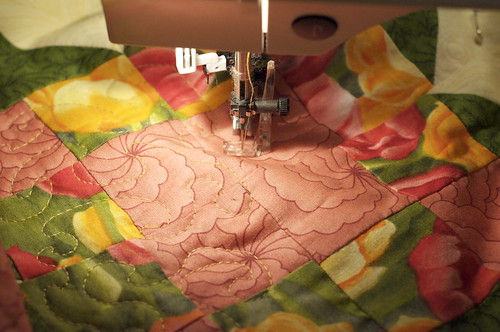
Step 9.  Stitch.  If you are still skeptical and subscribe to the "measure twice, cut once" school of thought, baste it and test as shown in Step 10 below.  Then stitch it once you are sure it will join nicely.
DSC_0031
Step 10.  Before you trim the seam allowance, check to make sure nothing is twisted and that the binding will lay flat.  (This is where I kept running my head into the wall before I found the $20 solution - it would just not lay flat and was twisted every which way.)
DSC_0034
Step 11.  Trim.  Finger press the seam open and continue sewing the binding down along the open space.
Step 12.  Pour yourself a stiff drink and celebrate, admiring your perfect binding!
I hope this is a useful tutorial for you if you have bought this tool and had trouble making it live up to its promise.  I do find that it makes perfect bindings, now that I know to pin that piece down.  Good luck - I'm not a professional quilting maven, so cannot take any kind of responsibility if you chop your fingers off!  This is my first tutorial, so if you think it is confusing please let me know and I'll try to fix it up!
P.S.  The binding for that Jacob's Ladder is all basted and ready to be sewn on tonight - I'll do the big reveal tomorrow.

Lookit!

/ Monday 25 January 2010 /
Can you believe my good fortune?  Look what I won from Thelma's giveaway!  Can you believe that generous stack of goodness?  And she had four of these bundles to give away!  All I had to do was leave a comment cheering for the Colts!  (Now if she had asked me to cheer for the Maple Leafs, I'm not sure I could have done it!)  Many oodles of thanks to the oh-so-awesome Thelma!


P.S. I finished quilting the Jacob's Ladder yesterday.  All it needs is the binding - with luck I can do that tonight!

Weekend minutes

/ Sunday 24 January 2010 /
This term I have a heavier teaching load than I did last term, and I'm really feeling the pinch when it comes to my quilting productivity. Last weekend I pinned this quilt but it was only last night that I got a chance to start the quilting. One of my courses is a new prep, so I'm devoting a lot of time to getting things read properly and seminar material organized. I'm not really complaining, since I do love my job - not to mention that the university writes my paycheques and therefore indirectly supplies my stash habit!
My first granny square
Progress in crochet-land continues apace. Perhaps I am being kind to myself by measuring progress in inches rather than miles. This granny square still looks pretty weedy and off-kilter, and I tell no word of a lie when I say this is probably granny square, take 200. Never mind, it does look better than the previous 199 efforts! I'm enjoying learning to crochet - and granny squares are nice interleaved with course prep. It's easier to ration, as well. I can tell myself I'll do one round on the granny square and then I'll read half of a journal article, and it actually works - trying to work that kind of a deal with quilting is a mug's game!

Generous Folks

/ Wednesday 20 January 2010 /
Last week I posted about the awesome surprise package I received from Momloves2quilt in a pay-it-forward scheme.  As you probably know by now, this means that I am now charged with paying forward some amazing goodness to three people, who, in turn promise to do the same.  I just let the famous random number generator do its stuff, as shown below:


Therefore, according to the scientific method, the winners are Crafty Maine Mom, Tamera and Becky Gonce!  Three cheers for these generous folks, who are each going to be making three people very happy.  And with any luck, I will do the same for each of them.  Here's the game plan, ladies: send me your mailing address, and before January 20, 2011, you will receive a goody bag in the mail from me.  At that point, you will want to blog about it (or Flickr, FAcebook, etc.) and ask for volunteers, from which you will pick three.  And you will have a year from that date to deliver on your promise to make someone smile.

Attitude, Gratitude and Crazy, Crazy Dreams

/ Tuesday 19 January 2010 /
I think I have to stop drinking coffee in the afternoon.  I used to think that caffeine didn't bother me.  I would blithely drink a cup for a treat instead of dessert, and then go off to bed and fall asleep quickly.  Caffeine never kept me from falling asleep.  But staying asleep was a different story.  I would have crazy anxiety dreams where I would obsess over things like the house developing dry rot or about how I was going to pay for my daughter's university tuition or what exactly was that mole on my neck.  I would wake up many times during the night, worn out, and say to myself, enough is enough!  Go to sleep already!  Finally I realized that I was being affected by the caffeine, and I stopped drinking coffee after 6pm.  But a late afternoon cup of java is a real necessity for me, so I always have one around 3pm.


Recently, though, I've been having those same obsessive, crazy dreams that just won't quit.  Only this time they're craft related.  For example, two nights ago, I dreamed I had received the shipment of Anna Maria Horner voile that I had ordered (see the image above, that I snagged from Sew Mama Sew).  And for some reason, with great urgency, I had to cut it all into 2 1/2" squares and send it to Haiti.  I was coordinating with the Red Cross on this, and the plane was waiting on the runway to take my voile packages to Port au Prince.  All night long I was cutting voile, and every time I would be almost finished, a new stack would be uncovered and require cutting.  It was all go, rush, rush, to save lives - because in dreams it makes sense that a shattered populace would need designer fabric, right?  And a blistered thumb from the rotary cutter is a small sacrifice to make.  Sheesh!


And last night, I was dreaming about applique, which is on my list of New Year's Quilting Resolutions.  In reality, I haven't yet set on my first applique project, but in the midnight hour of last night, I was determined to applique the iconic image from Woodstock.  You know, a guitar neck with a bird on it.  Or was it an entire guitar with a bird on it?  This became a consuming question - I wonder how many calories I burned up, tossing and turning, fretting over whether it was neck-only (applique-able) or whole-guitar (not applique-able, due to skill level).  Of course, I was not at Woodstock, being only nine at the time, and I'm not remotely interested in Woodstock, but the answer to this dilemma can be solved by a simple keystroke chez Google, which is what I did to find the image posted above.  Why on earth I couldn't say calmly to myself "I'll have to Google that in the morning" is beyond me.  P.S.  As you can see, it's neck-only.  I'll get right on that applique.  NOT!
And these are only the two latest stories - can you imagine the dark night of the soul and self-torture that went on over that foundation piecing?  It was brutal!  So, yes, with the deepest regret, I think the afternoon cup of joe has got to go.  What about you?  Can you drink coffee in the afternoon?  Do you have dreams that involve quilting?

What's doing?

/ /
My mother used to say that she couldn't crochet anything but a rug - by which I think she meant she had never learned to do anything but hook in the round and around and around. I think that's why I never felt compelled to pick up the single needle: clearly, crochet talent did not run in my family! But now I am trying to learn to crochet, teaching myself via the video tutorials by the amazing Pip Lincolne at Meet Me at Mike's. This photo shows a few rows of single crochet, but Pip's tutorials are for a granny square. Mine are so feeble and frail that they look more like great-granny squares! The tutorials have only taken us to the second round, so when I get one completed, I'll share it, warts and all, on the blog. You have been warned, so that you may Avert Your Eyes.

Also, I have assembled the quilt sandwich for this Jacob's Ladder that I am making for a dear friend  who is divorcing and needs something for comfort during this difficult time.
Getting ready to quilt Jacob's Ladder
Actually, the top is one that I made nearly ten years ago, but was never really enthused about.  In the summer, when I dug it out of the basement and had it airing out on the line, my friend saw it and mentioned how much she loved it.  I knew that if I couldn't give it to someone who appreciated it, it would never get finished.  Here you can see the backing - it's from Sandi Henderson's Farmers' Market line.
Jacob's ladder in progress
Plus, I have fabric for another bee block, this one for Barb, which I haven't yet touched, not to mention being behind on replying to the comments that people so kindly left about my foundation piecing attempts.  Time to get moving!

Getting the hang of it

/ Friday 15 January 2010 /
I volunteered to make a pink block for a quilt that will be auctioned for a breast cancer awareness auction in October.  The call was put out by Dana on Flickr.  I thought it would be a good chance to practice the paper piecing skills that I'm trying to sharpen up. After making Jessica's 9 1/2" block, I was ready to try a bigger one: this one is 12 1/2". It's called Divided Star and the original pattern by Marcia Hohn is here. Please forgive the quality of the photo - I had to arm-wrestle my daughter for a spot on the bathroom counter where the light was best - it's so overcast today there was no hope of an outside shot.

I think I'm getting the hang of paper piecing. Things I like: awesome, really skinny points and sharp corners that look good and match up well,and , also, the intricacy that a paper-pieced block allows. But I still struggle with knowing how big to cut the fabric to make sure it will fit once it's sewn and flipped. I seem to have a zero-sum approach - either the piece is too small, or it's so big that I end up cutting away twice the amount that I actually needed. Either way, it seems to be a shockingly profligate way of block assembly.

You may think I have some chutzpah signing this up for Sew-n-Tell Friday, since that's supposed to be for finishes, and how can one measly block qualify as a finish? But this is a finish since I'll be sending it in as is, but also because it took hours to do! Every little step I take in paper piecing seems like a huge accomplishment to me!

Teh Awesome!

/ Wednesday 13 January 2010 /
Do you ever have one of those days when things are just out to get you, and then the mail comes, dropping an AWESOME BOMB OF SURPRISE AWESOMENESS in your lap?  That was me yesterday!  The truth is, I am not so successful sticking to my fabric diet, and I usually have these little treats sent to the university so that my husband isn't aware of how much fabric actually comes into the house. (What he doesn't know can't hurt me, am I right?  You know I am!)  So when I saw this little box, I assumed it was something I had ordered.  I opened it up to find the oh-so-generous "pay it forward" treasure box assembled by Momloves2quilt.  I had completely forgotten about it, and I was flabbergasted by the great things inside!  This was truly a ray of sunshine on a miserable Canadian-winter day!
Pay it forward score!
Here's what I got:
2 yards of this green Glace print
2 Glace charm packs
Schnibbles pattern "Hat Trick"
Sweet little notepad with magnetic back
Little book called 100 Tips from Award Winning Quilters

The deal with Pay-It-Forwards, as I'm sure you know, is that the recipient commits to sending a goody-bag of some sort, be it handmade goodness or tools/supplies/patterns, to three people, during the next 365 days.  And those three people commit to doing the same.  I am happy to pay it forward to three people who leave comments here, chosen by the good old random number generator.  I'll draw the three names on January 20.  Important:  There has to be some way to contact you.  Although you type in your email address when you leave a comment I am not able to see it unless you have set your profile settings appropriately.  I have been able to find a couple of commenters in the blogopolis due to their unique user names, but there is at least one commenter who I cannot identify yet.  If you are in doubt, here's what you do:  go to your profile and click edit.  The box that says "show email" should be checked.  If not, check it.  It is a bit misleading, because although it says "show email", your email address will not show up when you leave a comment on someone else's blog, but the blog owner will be able to return an email to you.  If you are still reluctant to do that, you can leave your blog address or your Flickr username and I can find you.

Updated to add: How terrible is the news about the earthquake in Haiti!  The networks show photos and video of utter destruction.  I encourage everyone to give to your local Red Cross aid efforts.  And kudos to the Israelis, who were first on the scene for disaster support.

Success!

/ Saturday 9 January 2010 /
DSC_0055
Here it is! Jessica's block is complete, and it is the proper size! We can attribute all the angst in yesterday's post to user error. The problem seemed to be my printers. Neither of them printed the true size and I neglected to check with a ruler before I made the practice block. I really appreciate all the great suggestions that you all made for how I could save this block. I increased the print scale to 103%, as Suzanna suggested, and it made all the difference. Another suggestion was to increase the width of the centre strips just a smidge, and I think that would have worked fine, too. And I just have to shout out to Monica here, who so kindly offered to run up a block in the proper proportions in EQ and send me a pdf. I declare, you meet the nicest folks on teh interwebz!

I'll be sending this off to Jessica on Monday. I can't wait to see how her Coffee and Brown Sugar quilt looks with all the blocks together. Mind you, she has a big job for herself with all the pieced setting blocks that go between these focus blocks. It's going to be a stunner!

Yay for internet fun!

/ /


A Wordle for this blog!  Go here to make your own.

Practicing

/ Friday 8 January 2010 /
Here's the practice block from yesterday, all complete. Ignore the fabric choices - since I was practicing, I chose whatever was at hand. An actual block of this pattern would be more effective if it were less busy.

Good news: (1) the paper was really easy to remove, (2) the individual squares were perfectly square and all the same size, (3) the long strips making up the X in the centre meant that there was no worry about matching a million seams when joining them up.

Bad news: Only one piece of bad news, but it's a doozy. Although the block was clearly marked as a 9" block on the quilters cache page, I assumed it meant 9" finished, or 9 1/2" raw. But no, it is a 9" block unfinished. A perfect 9" block, but Jessica needs a 9 1/2" unfinished block. Oy. I have the option of sashing it, I guess. Or start over and try to find another block pattern that will finish at 9 1/2".

Lesson learned: Making a practice block is really worth it.

Terrified!

/ Thursday 7 January 2010 /

paper piecing, originally uploaded by Shadrach Meshach & Abednego.


Time to get off my fundament and make my block for Jessica.  She was so organized and sent out her fabric well before Christmas.  I had such good intentions to be speedy in return, but little did I know that so many other Incredible Shrinking Quilters have such mad skillz!  They toss off complicated foundation-pieced blocks as simple as I might do a rail fence block!  I don't want to let down the side, and polishing my extremely rusty foundation piecing abilities is one of my New Year's Quilting Resolutions, so time to get moving!
test blocks
This is the start of my practice block.  It's Belted Star, from Quilter's Cache.  You make four of these, and then join them with a 1" strip that forms a cross.  The 9" block will be on point, so that strip will make an X.  Actually, I made the four squares already, but didn't realize until they were all done that I had printed two foundation sheets in a bigger size.  Silly me, I thought I was just getting better at them, but they were only sized larger and easier to manage!  The paper is still on.  I'm not sure how easy it will be to remove.  I suppose I'll find all that out tonight, when I finish the practice block.
No matter how beautiful this practice block turns out, I'm sure I'll be shaking in my slippers when I go to cut into Jessica's beautiful fabric.  I didn't realize how stressful it is to make a block for someone else!  Where's the Wizard of Oz?  I need some courage!

Tradition Modified

/ Monday 4 January 2010 /
Here is the flimsy for the Modified Tradition quiltalong.  It was on my list for the Joy in the New Year challenge, but it didn't quite make it. And even now it isn't finished finished, but the quilt top is pieced. I do have the backing and batting for it, so I'll be quilting it one of these days soon. The dilemma will be how to quilt it.
Sampler closeup
It's destined for the lab, where we have a godawful brown Naugahyde sofa. It will be nice to have a quilt to wrap up in to read journal articles or mark student papers.
Sampler closeup
I like it more than I thought I was going to. I like the narrow sashing and the small, plain setting blocks, and, while I'm still not sure that blue was the right choice over the red that was also in contention for the sashing, I think it works okay.  Thanks, Jennifer and Crystal, for starting this quiltalong!

Popular Posts

Modern Day Quilts
 
Copyright © 2010 Stitch Literate, All rights reserved
Design by DZignine. Powered by Blogger