


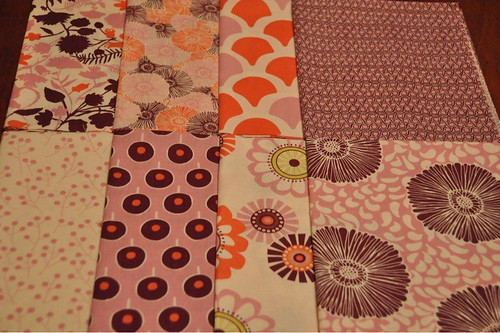
You can see that on balance, they are all pretty light, so I went looking for some darker ones. Here is a photo of my selection process.

I tried to get a range of values from light to dark. A black and white photo helped me ignore the actual colours and see the values more clearly. Overall, I think I did an okay job picking fabrics. I'm not trained in art of any kind, so I really learn as I go and, unfortunately, too many of the lessons are learned after the fact! Here's what I learned in making this quilt.
First, directional fabrics. Unless you are possessed of amazing spatial sense and intense determination, you will likely get directional fabrics oriented every which way. I knew this would happen to me, so I limited my directional fabrics to small prints, like this one. See how the lines in this print are perpendicular to each other, rather than all going the same direction? I am okay with that since the print is small - I would be annoyed if it were bigger.
I was also surprised when I realized that some prints were actually directional, when I didn't realize they were. For example, this Hope Valley. See how the diamonds point east-west in part of the ogee but north-south in another?

Even this one is directional, although it doesn't show so well in this photo. But the name of the print is Oval Elements, so that is enough to tell you that it is directional.
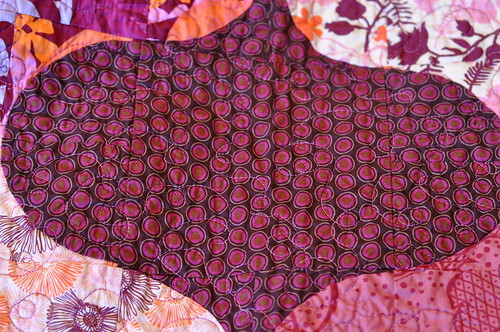
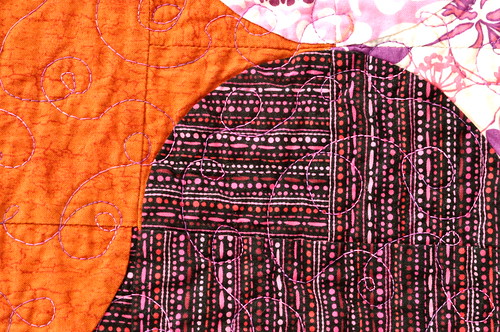
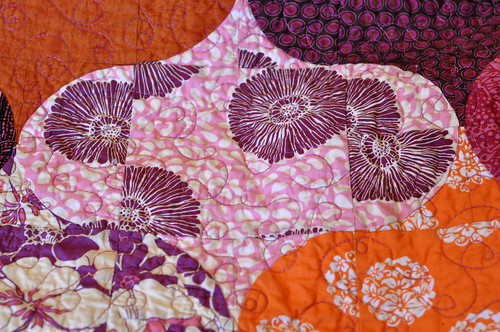
Second, large-scale prints. Strictly speaking, these are also directional, but I think the important design element here is how sparse the main figures are; this has a bearing on how coherent the ogees look. For example, here are two ogees where the print is quite dense - I think this obscures the joins where the parts of the ogee come together and makes them look quite tight and coherent.
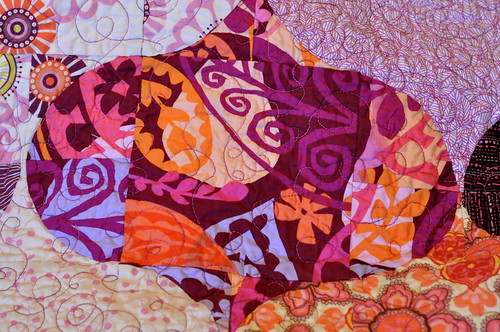
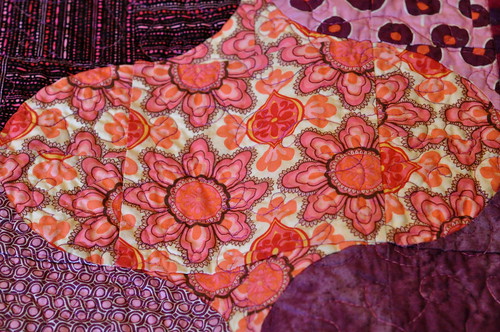
On the other hand, here are a couple of examples where the main figures on the prints are quite sparse. I think that, with these prints, the way the pattern is broken up makes the joins in the different parts of the ogees more obvious, and it looks less tight and coherent.

Third, solids. In my initial fabric pull, I had included a Kona solid purple, but a number of readers commented that it didn't look right to have a single solid in with all the prints. I agreed that something didn't look quite right. I replaced it with two fabrics that were looked like hand-dyed solids. They weren't, but they had a bit of visual texture while retaining the essence of a solid. This gave them enough action that they went well with the prints, while the Kona solid was too flat all by itself. I think they looked fantastic. I didn't take individual photos of these, but you can see the orange solid at the left of the first photo below, and the purple solid that was the poverty piece in the second photo. (As to that poverty piece, this is what happens when you don't ensure your fat quarter is big enough, as I mentioned in my previous post.)

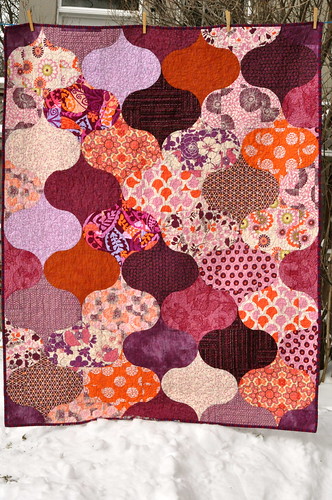
I am picking on individual prints here, and showing you individual ogees to make my points. So here is the whole quilt again, so you can see what I mean when I talk about "more" and "less" coherent, tight or successful ogees. Go and look at other quilts made using this pattern to see if these principles also apply here, here and here - I think they do. I lack the technical vocabulary, so I hope this all makes sense. When I look at the quilt as a whole, and I consider my fabric choices, I feel that I was still a bit heavy on the lights, and I could have used another dark or two. This is descending to the level of the ultimate picayune, as my mother would say, because on balance I think the quilt works very well and I love it dearly.
So! The schedule! Here's what I have planned.
Finish cutting by Friday, May 6 (I will have a very short cutting post for you later today, so I suggest you wait for that - I made a cutting error that led me to another poverty patch when I made this pattern the first time.)
Decide on layout and prepare work sheet (for those of you who do not have permanent design walls, like me) by the following week, ending May 13
Practice sewing curves on scraps, week ending May 20 (I may have a plan for a mini-project based on your successful scrap curves - stay tuned.)
Piecing frenzy for two weeks, ending June 3 with a completed quilt top!!!
I'm excited! Don't forget to join the Flickr group and post your fabric for us to ooh and ahh over and to provide advice if desired. And, of course, you can join the QAL at any time.


3 comments:
What an amazing quilt and I love the colors! I can't join you on the QA, but I'll keep checking back. =)
Whoo hoo! I added my photos to the flickr group. Trying to make sure I have enough definition between prints.
I bought some solid silk jewel toned fabric with an embossed floral pattern to make this quilt from, but I'm nervous how it will work out. I think the directionality of the silk itself (more shiny and can appear a different color on a right angle) may make it look funny. But, it might make it more shimmery. I'm not really sure how silk as a fabric will work either. Any suggestions?
Post a Comment
Thanks for dropping by - I'd love to hear what you think, so please leave me a comment!