I don't know why I feel compelled to have he first words out of my (virtual) mouth be "Please overlook my bad housekeeping" - nevertheless, please do!
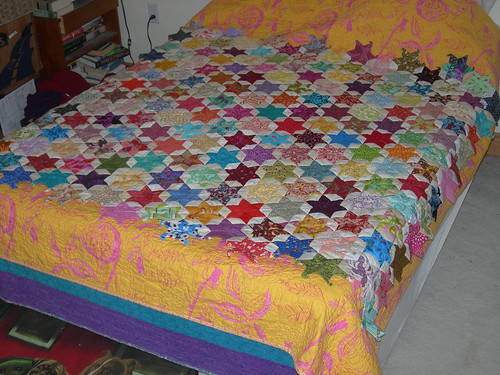
Because it has gotten so big, I couldn't find a better place to lay out my English paper-pieced diamonds in order to snap an update photo. I started working on this in the middle of August of last year. They are made using 1.5" plastic templates (I use Quilt Patis brand). I have enough diamonds cut to extend it probably one side's worth of diamonds and then I'm going to stop and turn my hand to finishing the quilt. Jessica said she appliques the pointy edges of the diamonds to a piece of fabric with a straight edge that you can then put a binding on. Sounds good to me, but it's going to be a lot of hand sewing! I'd better get to it - I'd love to have it done before August rolls around, but I think that's unlikely!
To see more EPP diamonds, check out our Flickr group here!
She finally decided
/
Monday, 16 May 2011 /
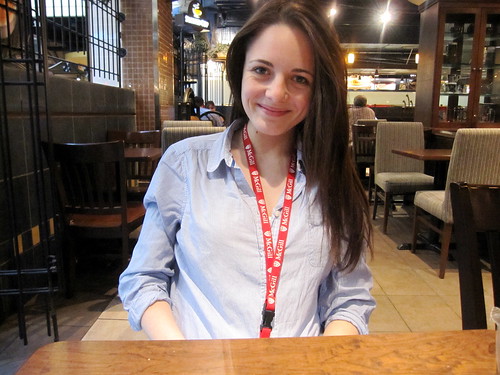
It is a very happy day here, since, after weeks of agonizing, my daughter has finally decided in favour of McGill University in Montreal, the most beautiful city in North America (and thankfully, only a three-hour train ride away). My husband and I are both alums of McGill, so we are thrilled that she has chosen to wear "the red and white sweater, the dirtier the better"!
Let's fade out with a rousing chorus of the song by E. Wallace Willard Jr. (Arts, 1923).
When James McGill set out to found a university
He often used to wonder what sort of place 'twould be
But when he reasoned to himself within his heart of hearts
He knew the proudest place would be the Faculty of Arts
Arts, Arts, a wonderful place is Arts.
So banish cares and troubles 'til the dawning.
We shall pass the bowl along and we'll sing a joyous song,
'Cause we don't get up for classes in the morning!
Let's fade out with a rousing chorus of the song by E. Wallace Willard Jr. (Arts, 1923).
When James McGill set out to found a university
He often used to wonder what sort of place 'twould be
But when he reasoned to himself within his heart of hearts
He knew the proudest place would be the Faculty of Arts
Arts, Arts, a wonderful place is Arts.
So banish cares and troubles 'til the dawning.
We shall pass the bowl along and we'll sing a joyous song,
'Cause we don't get up for classes in the morning!

Bloggers' Quilt Festival Entry - Spring 2011
/
Friday, 13 May 2011 /
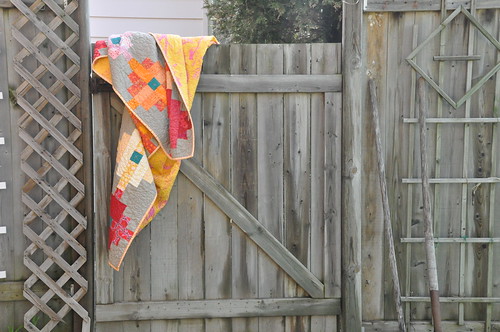
My regular readers may say ho-hum when they see this post, since I wrote about this quilt when I finished it just a week or so ago. But I am so in love with it that I knew it had to be my entry into the Blogger’s Quilt Festival this spring.
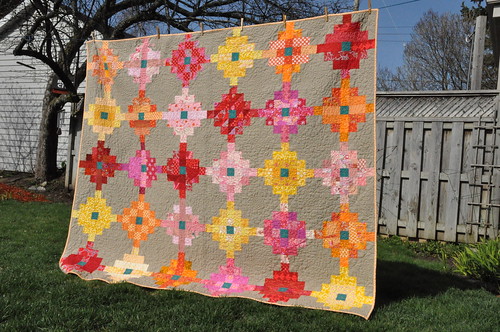
The name of this quilt is Miss March. March 2010 was my month for sending out fabric to the ladies in the Modern Tradition Quilt Bee. I sent everyone a bunch of fabric in two different colourways and asked for two monochromatic blocks.
The pattern is based on a traditional one – I found it here – which is made with 2.5” strips of different lengths surrounding a centre square. I wanted to update it a bit and also to allow my bee buddies to have scope for their imagination. So I asked them to use the teal square in the centre, but to have a party in the coloured bits.
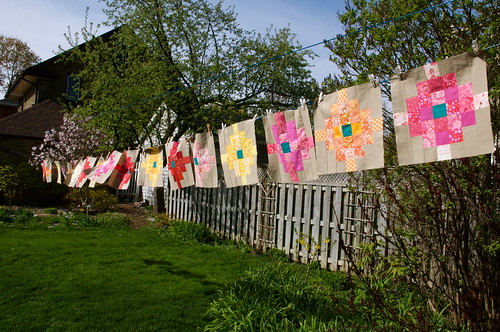
I was so excited by what they did! One of the blocks has some tiny four-patch mini-blocks that measure 2.5”. One is made entirely of half-square triangles.
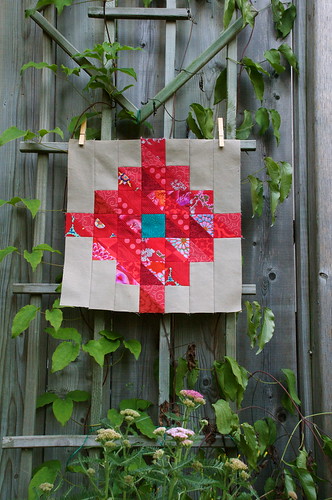
One has large panels made of improv/crazy piecing.
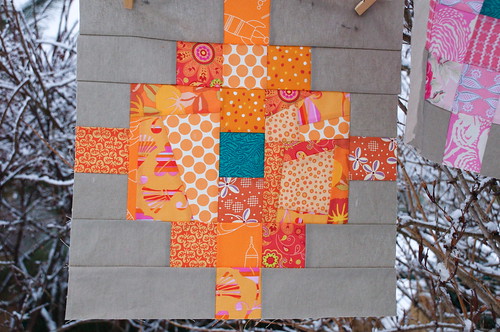
Some are made entirely from strips, some are made entirely from squares, and some are an energetic mixture of both!
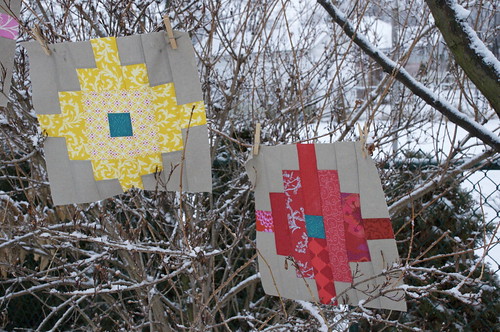
The talents of all these bee quilters were really in evidence – I was thrilled. And fortunately I also had help with the assembly of all the blocks.
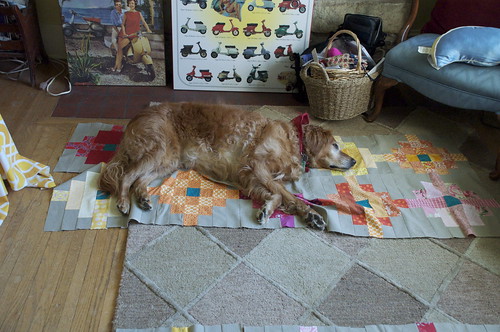
I used Essex linen-cotton blend in Putty for the background. It was okay for piecing, but when it came to quilting it stretched like a fiend. I like the contrast in colour and texture with the background and the flowers.
I chose this pretty Tina Givens print for the back. I think it’s perfect!

And to add to the excitement that I feel over this quilt, it is also the first time I have ever tried to do an actual motif-doodah in my FMQ. Normally, I do variations of an allover, more or less swirly quilting meander. But this time I knew that those large spaces left by the linen called out for something special.
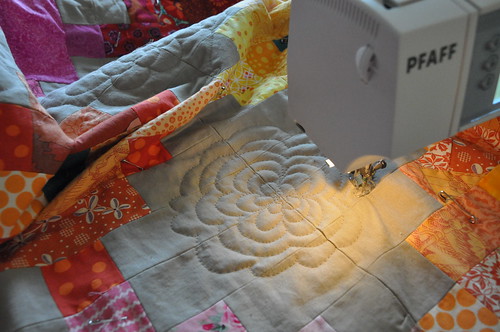
I used, more or less successfully, a kind of flower motif that looks like some kind of chrysanthemum on steroids. Thankfully, once the quilt was washed, it became harder to see that some of those flowers looked like hamsters after a binge weekend. Overall, though, I was pleased with the quilting and am encouraged to continue to challenge myself in that domain.
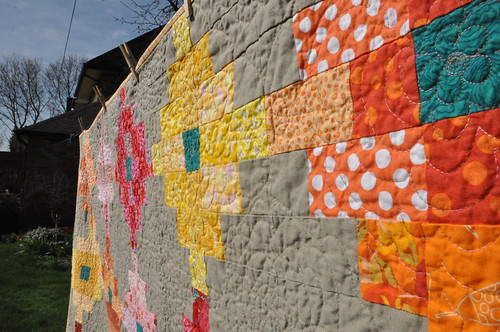
This one is going on my bed. I’m glad to have a new quilt to replace the one I’ve been using for so many years – I made it when I was pregnant with my daughter in 1993! After all those years of wear, including two sets of two dogs who loved to lounge on it, it was ready to retire. Miss March is a worthy replacement!
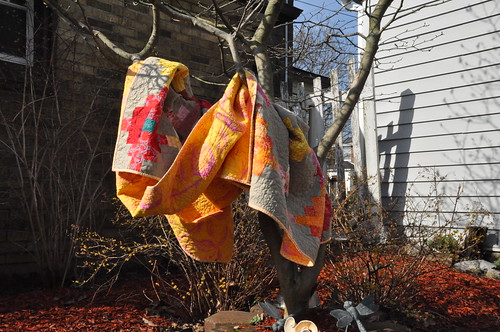
I’m glad to have the chance to feature this in Amy’s Blogger’s Quilt Festival. I’m excited to see what everyone else is showing this time!
Ogee Quiltalong: Cutting
/
Thursday, 5 May 2011 /
Posted in
ogee,
ogee QAL,
quiltalong
I love the fabric choices that folks have posted in the Flickr group so far! If you are quilting along, I encourage you to post photos of your fabric. If you don't do Flickr but have photos on a blog, let me know in a comment so I can link up and share with the other QAL-ers. Now it's time to get cutting!
EDITED TO ADD: This is very important, folks! When you are printing your .pdf pattern, make sure it does not scale the pattern to fit the page (there is usually a check box asking if you want this in the printing process - on some printers it is the default to be selected. Deselect it, if this is the case for your printer.) Template A and Template B on the pattern must fit the small squares that you cut in step 3 below. If you do not follow these instructions, your A and B pieces will be too small!
It's a bit tricky; since this is a proprietary pattern, it would be very poor form for me to post photos that would make it possible for people to easily make he quilt without buying the pattern. So the photos I am showing here are necessarily a bit abbreviated, but I think they will help with the points I want to make.
First, I want to say that the instructions in Rebecca's pattern are very good, so if you follow them to the letter, you won't go wrong. However, you should know that this is definitely the time to apply the rule "measure twice, cut once". If you make a mistake in your cutting, and if you are cutting from fat quarters with no backup yardage, you are SOL. Not to scare you, or anything, ha ha. So in this post, I want to point out some things to look for so you don't go wrong.
1. As I said in a previous post, begin by measuring your FQs. Different shops are more or less generous in their cutting. A stingy FQ will be 18" on the short side. I am using a Kona solid bundle and these FQs are very stingy: not a hair over 18". This means I have very little scope for straightening up the cut, since the calculated waste on the 18" side is only 1/2". If you have more generous FQs, you can breathe a bit more freely.
2. You want to begin by cutting 1 wide strip and 3 narrow strips from each FQ (the width dimensions of the strips are in the pattern). The FQ will be 18" x 20-22". Make sure you cut the strips so that they are 20-22" long. If you cut them 18" long you will not have enough fabric. In this picture I have the ruler along the 20" side.
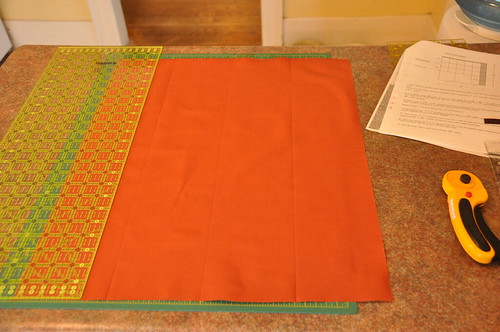
3. Subcut the strips into the pieces that are marked on the pattern. You will end up with 17 small squares and 2 large squares. Here you can see the waste from the 18" side when cutting the strips: that 1/2" strip on the right side of the cutting mat.
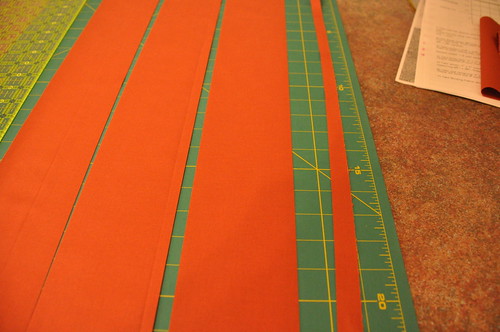
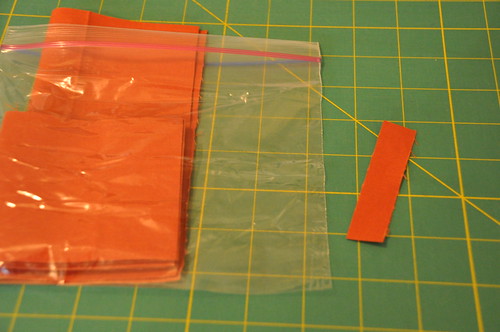
4. After I cut each FQ, I am keeping the pieces together in a plastic sandwich bag. (The reason I am doing this is that some of the Kona solids are very similar in colour, and I don't want to get them mixed up. If your fabrics aren't too similar, keeping them in separate bags isn't really necessary.) NOTE: From a piece of the waste fabric, cut a small swatch and keep it safe. You will use this when you are planning the layout of the quilt. This is not in the pattern, but it is something that I found extremely helpful when I made my first Ogee quilt, since I don't have a design wall that I can leave up for extended periods. Here you can see the the size of swatch I have preserved. I keep it in the plastic bag with the other pieces from the FQ.
5. The pattern provides two templates for you to use to cut the curved pieces. I used some Dritz template plastic to trace the pattern pieces onto with a smudge-proof pen.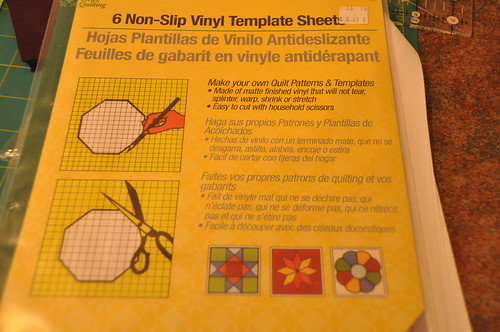
This plastic is fairly thick and I like it, but any reasonably stiff plastic or even cardboard can be used. When you cut the templates out, be sure and transfer the marks at the centre of the curve onto the template with a pen. Cut them carefully out with scissors.
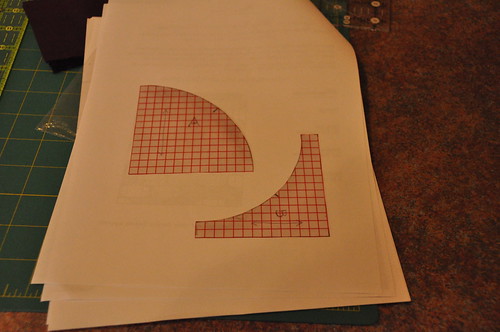
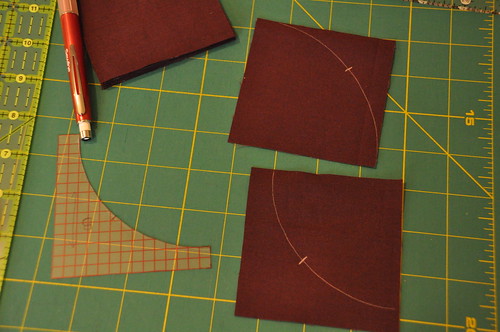
6. Fit one of the curved templates onto one of small squares that you cut from the FQ, and trace around with a sharp pencil. I used a regular mechanical pencil when I made my first Ogee quilt, but I am using this Sewline fabric pencil with white lead for this one, since so many of my fabrics are dark.
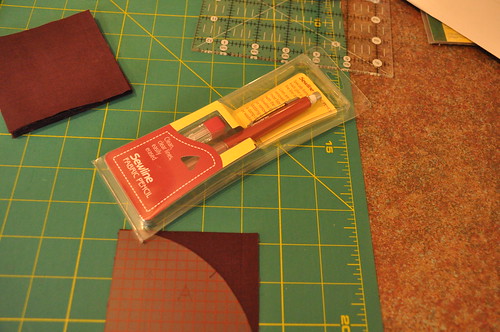
The pattern will tell you how many of Template A and Template B to cut from each FQ (see Step 3 on the pattern). Be sure and mark the centre point of the curve.
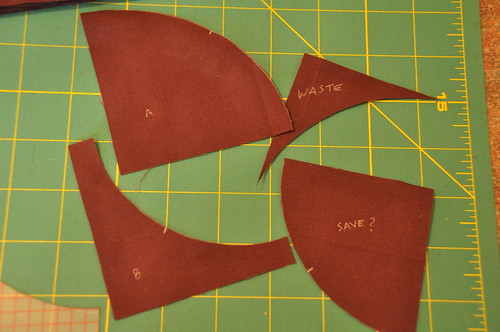
7. Cut along the marked line carefully. Here's what you will have after you have cut out one Template A and one Template B. I pitch the leftover from Template A (marked "Waste"). I save the segment that remains after cutting Template B - marked "Save?" - the question mark means that it's up to you to save or not. It is not required for the Ogee/Curlicue pattern, but I think you could probably do something interesting with them. You will have a lot of them when everything is cut out.
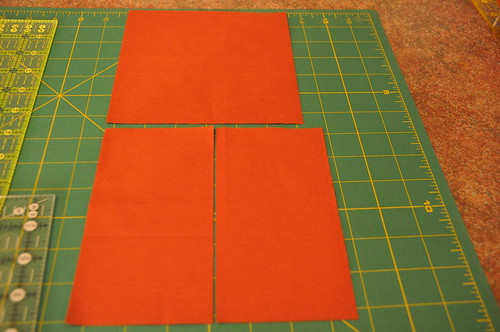
8. After your initial cutting of the strips into squares, you will have 2 large squares from each FQ. Since the pattern calls for 20 FQs, you will have 40 large squares in total. Pick 32 of these for the main ogees in the pattern. Step 4 of the pattern says to trim each of these 32 large squares down to slightly smaller squares (see the Step 4 of the pattern for the precise dimension). Of the remaining 8 large squares, pick one for your corners and set it aside. NOTE: This next bit is where I started off wrong when I made the pattern the first time. With the remaining 7 squares, trim ONE SIDE ONLY - the pattern will tell you how much (I went hog wild and continued to trim on both sides, because I didn't read the pattern carefully). At that point, cut that piece in half to form two equal rectangles (again, the precise dimensions are in Step 4 of the pattern). In the photo below, you can see what happens to the two large squares of a FQ: the one on top will be one of the 32 main ogees and has been trimmed to a slightly smaller square. The one on the bottom has been trimmed on one side only, and then bisected into two rectangles. The photo looks elongated because I was at an angle - sorry!
9. The last large square that you set aside in that FQ will be cut into four equal squares - the pattern will tell you the exact dimensions (see Step 6). These will be the corners of your quilt top. No photo for this step.
Done! Phew! Have fun cutting! And don't forget to post photos if you haven't already!
And if you aren't quilting along but you read through this entire post, here is your reward:
EDITED TO ADD: This is very important, folks! When you are printing your .pdf pattern, make sure it does not scale the pattern to fit the page (there is usually a check box asking if you want this in the printing process - on some printers it is the default to be selected. Deselect it, if this is the case for your printer.) Template A and Template B on the pattern must fit the small squares that you cut in step 3 below. If you do not follow these instructions, your A and B pieces will be too small!
It's a bit tricky; since this is a proprietary pattern, it would be very poor form for me to post photos that would make it possible for people to easily make he quilt without buying the pattern. So the photos I am showing here are necessarily a bit abbreviated, but I think they will help with the points I want to make.
First, I want to say that the instructions in Rebecca's pattern are very good, so if you follow them to the letter, you won't go wrong. However, you should know that this is definitely the time to apply the rule "measure twice, cut once". If you make a mistake in your cutting, and if you are cutting from fat quarters with no backup yardage, you are SOL. Not to scare you, or anything, ha ha. So in this post, I want to point out some things to look for so you don't go wrong.
1. As I said in a previous post, begin by measuring your FQs. Different shops are more or less generous in their cutting. A stingy FQ will be 18" on the short side. I am using a Kona solid bundle and these FQs are very stingy: not a hair over 18". This means I have very little scope for straightening up the cut, since the calculated waste on the 18" side is only 1/2". If you have more generous FQs, you can breathe a bit more freely.
2. You want to begin by cutting 1 wide strip and 3 narrow strips from each FQ (the width dimensions of the strips are in the pattern). The FQ will be 18" x 20-22". Make sure you cut the strips so that they are 20-22" long. If you cut them 18" long you will not have enough fabric. In this picture I have the ruler along the 20" side.
3. Subcut the strips into the pieces that are marked on the pattern. You will end up with 17 small squares and 2 large squares. Here you can see the waste from the 18" side when cutting the strips: that 1/2" strip on the right side of the cutting mat.
4. After I cut each FQ, I am keeping the pieces together in a plastic sandwich bag. (The reason I am doing this is that some of the Kona solids are very similar in colour, and I don't want to get them mixed up. If your fabrics aren't too similar, keeping them in separate bags isn't really necessary.) NOTE: From a piece of the waste fabric, cut a small swatch and keep it safe. You will use this when you are planning the layout of the quilt. This is not in the pattern, but it is something that I found extremely helpful when I made my first Ogee quilt, since I don't have a design wall that I can leave up for extended periods. Here you can see the the size of swatch I have preserved. I keep it in the plastic bag with the other pieces from the FQ.
5. The pattern provides two templates for you to use to cut the curved pieces. I used some Dritz template plastic to trace the pattern pieces onto with a smudge-proof pen.
This plastic is fairly thick and I like it, but any reasonably stiff plastic or even cardboard can be used. When you cut the templates out, be sure and transfer the marks at the centre of the curve onto the template with a pen. Cut them carefully out with scissors.
6. Fit one of the curved templates onto one of small squares that you cut from the FQ, and trace around with a sharp pencil. I used a regular mechanical pencil when I made my first Ogee quilt, but I am using this Sewline fabric pencil with white lead for this one, since so many of my fabrics are dark.
The pattern will tell you how many of Template A and Template B to cut from each FQ (see Step 3 on the pattern). Be sure and mark the centre point of the curve.
7. Cut along the marked line carefully. Here's what you will have after you have cut out one Template A and one Template B. I pitch the leftover from Template A (marked "Waste"). I save the segment that remains after cutting Template B - marked "Save?" - the question mark means that it's up to you to save or not. It is not required for the Ogee/Curlicue pattern, but I think you could probably do something interesting with them. You will have a lot of them when everything is cut out.
8. After your initial cutting of the strips into squares, you will have 2 large squares from each FQ. Since the pattern calls for 20 FQs, you will have 40 large squares in total. Pick 32 of these for the main ogees in the pattern. Step 4 of the pattern says to trim each of these 32 large squares down to slightly smaller squares (see the Step 4 of the pattern for the precise dimension). Of the remaining 8 large squares, pick one for your corners and set it aside. NOTE: This next bit is where I started off wrong when I made the pattern the first time. With the remaining 7 squares, trim ONE SIDE ONLY - the pattern will tell you how much (I went hog wild and continued to trim on both sides, because I didn't read the pattern carefully). At that point, cut that piece in half to form two equal rectangles (again, the precise dimensions are in Step 4 of the pattern). In the photo below, you can see what happens to the two large squares of a FQ: the one on top will be one of the 32 main ogees and has been trimmed to a slightly smaller square. The one on the bottom has been trimmed on one side only, and then bisected into two rectangles. The photo looks elongated because I was at an angle - sorry!
9. The last large square that you set aside in that FQ will be cut into four equal squares - the pattern will tell you the exact dimensions (see Step 6). These will be the corners of your quilt top. No photo for this step.
Done! Phew! Have fun cutting! And don't forget to post photos if you haven't already!
And if you aren't quilting along but you read through this entire post, here is your reward:
I'm too sexy for my quilt
/
Wednesday, 27 April 2011 /
To be fair, I think my quilt is too sexy for me - introducing Miss March!

I made this quilt as part of the Modern Tradition Quilt Bee last year.

Blocks for this quilt were made by women all over North America and the UK.

I used as a model the traditional block Granny's Flower Garden from Quilter's Cache, but I encouraged everyone to use the dimensions as engraved in stone, but to go wild in how they used fabric to create the 14" block.
Sometimes people used individual 2.5" squares, sometimes they used strips. One person made mini-four-patches that measured 2.5". I made one block entirely from HSTs, and another that was pieced in crazy-quilt style..


I used Essex linen-cotton blend for the setting blocks. It was fine to piece, but it stretched like crazy in the quilting. There are definitely some bumpy bits.

I am proud of this quilt because this is the first time I was courageous enough to break out of my stippling rut in my FMQ work. It was a real chore to quilt this because it was so heavy! But I'm very happy with it.

The back is a nice Tina Givens print that I think goes perfectly. The batting is a bamboo/cotton blend.

Here she is in all her glory! I call her Miss March because that was my month in the bee. I think she's sexier than any centrefold! Many, many thanks to Melissa, Lydia, Greta, Sherri, Sandra, Heather, Norma, Rachel, and Leanne! You are all so creative and it was such a pleasure to work with you!
Because I'm Too Sexy by Right Said Fred has been running through my head ever since I wrote the title of this post, I'm determined to share the pain with you. Remember this one-hit wonder from the early 90s? He is definitely not sexy enough for Miss March!
Edited to link this up to Amy's Friday Sew-n-tell and Lynne's Fresh Sewing Day!
Getting started!
/
/
Posted in
ogee,
ogee QAL,
quiltalong
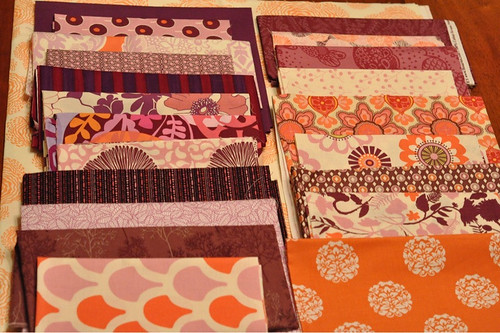
Time to begin our quiltalong! At the end of the post I'll set out the schedule that I hope to maintain. I hope you've had a chance to think about the fabrics you'd like to use for your ogees. I wanted to make a few observations about fabric and how it works with this pattern. When I made my first ogee quilt, I pulled a whole bunch of fabrics for consideration. I started with a fat quarter bundle of Sugar Pop in the pink/orange/purple colourway, which comprised eight different prints, and I pulled from my stash to supplement those. Here are the eight Sugar Pop prints.
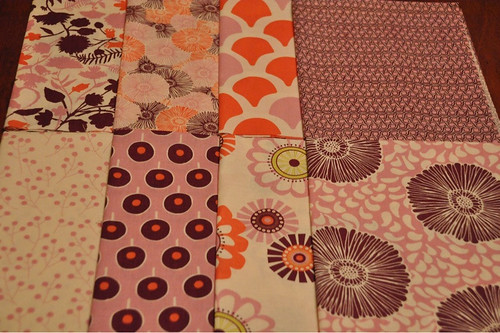
You can see that on balance, they are all pretty light, so I went looking for some darker ones. Here is a photo of my selection process.
I tried to get a range of values from light to dark. A black and white photo helped me ignore the actual colours and see the values more clearly. Overall, I think I did an okay job picking fabrics. I'm not trained in art of any kind, so I really learn as I go and, unfortunately, too many of the lessons are learned after the fact! Here's what I learned in making this quilt.
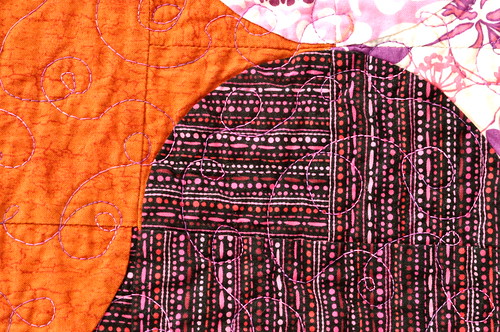
First, directional fabrics. Unless you are possessed of amazing spatial sense and intense determination, you will likely get directional fabrics oriented every which way. I knew this would happen to me, so I limited my directional fabrics to small prints, like this one. See how the lines in this print are perpendicular to each other, rather than all going the same direction? I am okay with that since the print is small - I would be annoyed if it were bigger.
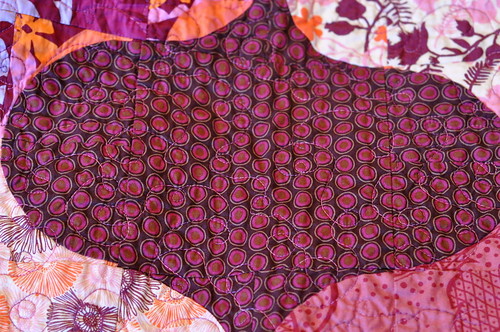
I was also surprised when I realized that some prints were actually directional, when I didn't realize they were. For example, this Hope Valley. See how the diamonds point east-west in part of the ogee but north-south in another?

Even this one is directional, although it doesn't show so well in this photo. But the name of the print is Oval Elements, so that is enough to tell you that it is directional.
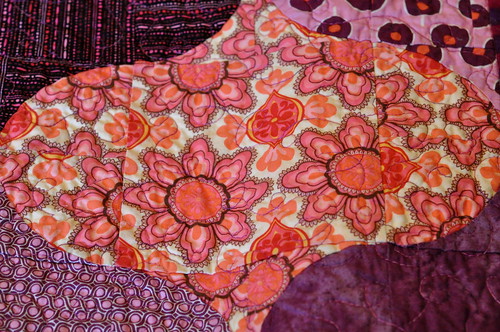
Second, large-scale prints. Strictly speaking, these are also directional, but I think the important design element here is how sparse the main figures are; this has a bearing on how coherent the ogees look. For example, here are two ogees where the print is quite dense - I think this obscures the joins where the parts of the ogee come together and makes them look quite tight and coherent.
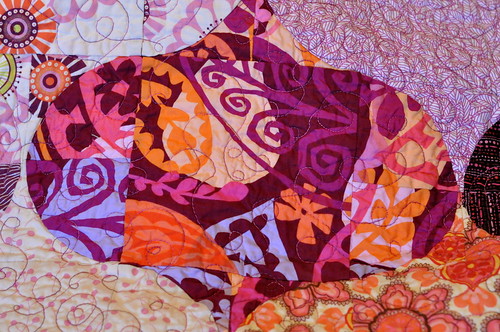
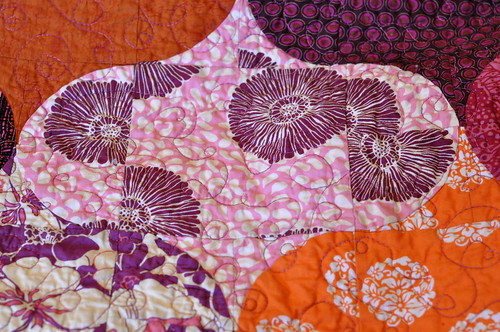
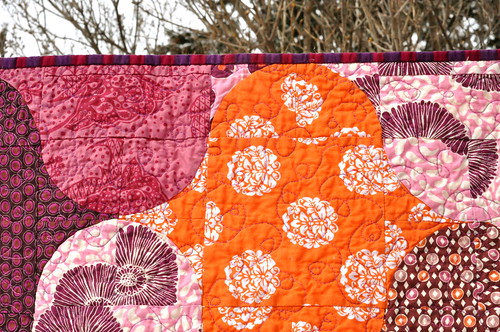
On the other hand, here are a couple of examples where the main figures on the prints are quite sparse. I think that, with these prints, the way the pattern is broken up makes the joins in the different parts of the ogees more obvious, and it looks less tight and coherent.
Third, solids. In my initial fabric pull, I had included a Kona solid purple, but a number of readers commented that it didn't look right to have a single solid in with all the prints. I agreed that something didn't look quite right. I replaced it with two fabrics that were looked like hand-dyed solids. They weren't, but they had a bit of visual texture while retaining the essence of a solid. This gave them enough action that they went well with the prints, while the Kona solid was too flat all by itself. I think they looked fantastic. I didn't take individual photos of these, but you can see the orange solid at the left of the first photo below, and the purple solid that was the poverty piece in the second photo. (As to that poverty piece, this is what happens when you don't ensure your fat quarter is big enough, as I mentioned in my previous post.)

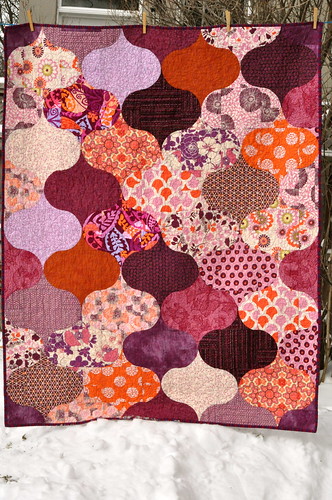
I am picking on individual prints here, and showing you individual ogees to make my points. So here is the whole quilt again, so you can see what I mean when I talk about "more" and "less" coherent, tight or successful ogees. Go and look at other quilts made using this pattern to see if these principles also apply here, here and here - I think they do. I lack the technical vocabulary, so I hope this all makes sense. When I look at the quilt as a whole, and I consider my fabric choices, I feel that I was still a bit heavy on the lights, and I could have used another dark or two. This is descending to the level of the ultimate picayune, as my mother would say, because on balance I think the quilt works very well and I love it dearly.
So! The schedule! Here's what I have planned.
Finish cutting by Friday, May 6 (I will have a very short cutting post for you later today, so I suggest you wait for that - I made a cutting error that led me to another poverty patch when I made this pattern the first time.)
Decide on layout and prepare work sheet (for those of you who do not have permanent design walls, like me) by the following week, ending May 13
Practice sewing curves on scraps, week ending May 20 (I may have a plan for a mini-project based on your successful scrap curves - stay tuned.)
Piecing frenzy for two weeks, ending June 3 with a completed quilt top!!!
I'm excited! Don't forget to join the Flickr group and post your fabric for us to ooh and ahh over and to provide advice if desired. And, of course, you can join the QAL at any time.
You can see that on balance, they are all pretty light, so I went looking for some darker ones. Here is a photo of my selection process.
I tried to get a range of values from light to dark. A black and white photo helped me ignore the actual colours and see the values more clearly. Overall, I think I did an okay job picking fabrics. I'm not trained in art of any kind, so I really learn as I go and, unfortunately, too many of the lessons are learned after the fact! Here's what I learned in making this quilt.
First, directional fabrics. Unless you are possessed of amazing spatial sense and intense determination, you will likely get directional fabrics oriented every which way. I knew this would happen to me, so I limited my directional fabrics to small prints, like this one. See how the lines in this print are perpendicular to each other, rather than all going the same direction? I am okay with that since the print is small - I would be annoyed if it were bigger.
I was also surprised when I realized that some prints were actually directional, when I didn't realize they were. For example, this Hope Valley. See how the diamonds point east-west in part of the ogee but north-south in another?
Even this one is directional, although it doesn't show so well in this photo. But the name of the print is Oval Elements, so that is enough to tell you that it is directional.
Second, large-scale prints. Strictly speaking, these are also directional, but I think the important design element here is how sparse the main figures are; this has a bearing on how coherent the ogees look. For example, here are two ogees where the print is quite dense - I think this obscures the joins where the parts of the ogee come together and makes them look quite tight and coherent.
On the other hand, here are a couple of examples where the main figures on the prints are quite sparse. I think that, with these prints, the way the pattern is broken up makes the joins in the different parts of the ogees more obvious, and it looks less tight and coherent.
Third, solids. In my initial fabric pull, I had included a Kona solid purple, but a number of readers commented that it didn't look right to have a single solid in with all the prints. I agreed that something didn't look quite right. I replaced it with two fabrics that were looked like hand-dyed solids. They weren't, but they had a bit of visual texture while retaining the essence of a solid. This gave them enough action that they went well with the prints, while the Kona solid was too flat all by itself. I think they looked fantastic. I didn't take individual photos of these, but you can see the orange solid at the left of the first photo below, and the purple solid that was the poverty piece in the second photo. (As to that poverty piece, this is what happens when you don't ensure your fat quarter is big enough, as I mentioned in my previous post.)
I am picking on individual prints here, and showing you individual ogees to make my points. So here is the whole quilt again, so you can see what I mean when I talk about "more" and "less" coherent, tight or successful ogees. Go and look at other quilts made using this pattern to see if these principles also apply here, here and here - I think they do. I lack the technical vocabulary, so I hope this all makes sense. When I look at the quilt as a whole, and I consider my fabric choices, I feel that I was still a bit heavy on the lights, and I could have used another dark or two. This is descending to the level of the ultimate picayune, as my mother would say, because on balance I think the quilt works very well and I love it dearly.
So! The schedule! Here's what I have planned.
Finish cutting by Friday, May 6 (I will have a very short cutting post for you later today, so I suggest you wait for that - I made a cutting error that led me to another poverty patch when I made this pattern the first time.)
Decide on layout and prepare work sheet (for those of you who do not have permanent design walls, like me) by the following week, ending May 13
Practice sewing curves on scraps, week ending May 20 (I may have a plan for a mini-project based on your successful scrap curves - stay tuned.)
Piecing frenzy for two weeks, ending June 3 with a completed quilt top!!!
I'm excited! Don't forget to join the Flickr group and post your fabric for us to ooh and ahh over and to provide advice if desired. And, of course, you can join the QAL at any time.
Recent events
/
Tuesday, 26 April 2011 /
I am a terrible hostess, I'm afraid, to start up a quiltalong and then vanish from the scene. I managed to draw the winners for the pattern giveaway and then notify the winners and post their names, but behind the scenes I was frantically involved in sad family affairs. Let me back up, though. On April 11, my husband and I celebrated our silver anniversary. Here is a photo of us on our wedding day. We are neither as slim nor as young today as we were then, alas!

But it was not the only silver anniversary that I celebrated that day. I also marked the twenty-fifth anniversary of my relationship with this woman, shown here on her wedding day in 1948. My mother-in-law, Freda. A widow for 23 years, Freda was greatly loved by all her knew her. She was a tiny woman, probably 90 lbs soaking wet, but full of life and always youthful in her outlook and understanding, a model of generosity and compassion.

Freda passed away a few days ago, at the age of 84. I mention this on my blog because I want to tell two stories. The first story is more on the order of a public service announcement. Freda ended up in hospital because we observed in her an extremely rapid cognitive decline. Ten weeks ago, she was a woman who was living alone, driving, managing capably in an independent capacity, maintaining active friendships, and with sharp awareness of world events, current movies, etc. Over that time, she showed increasingly accelerated confusion, with memory loss and anxiety. She forgot how to work her radio and television. She could not remember what her medications were. She repeated herself over and over. Of course, we thought it was Alzheimers or another kind of dementia. Now, although age-related dementia is not uncommon in the elderly, it does not typically progress with such speed. I won't tell you all the ins and outs of our medical odyssey, but to say this: a week ago yesterday we took her to emergency, and the result of their assessments showed that her sodium and potassium levels were very low. Apparently her blood pressure medication, hydrochlorothiazide, had leached these chemicals from her blood. And one consequence of low sodium can be cognitive impairment. As they adjusted the sodium and potassium levels, we saw our dear mother, mother-in-law and grandmother begin to return to us, and we saw her personality and spirit return. Alas, other medical issues coalesced to cause her to falter and fail, and we lost her. I am not a medical doctor, so any advice I give on this topic is worth as much as any other rambling on the internet, but I will say this anyway: what I learned from this is that old age may cause mental decline, but mental decline is not necessarily due to simple old age, and I would urge those of you with elderly parents to keep this in mind and keep an eye on their blood pressure meds.
When I re-started my quilting career after my 15 year hiatus, the first thing I did was to finish a project my mother had left in progress when she passed in 2008. The second thing I did was make this lap quilt for Freda. Here she is when I gave it to her. She loved bright colours.

The second story I want to tell is about something that happened at her funeral on Sunday. Shortly before the actual service, my daughter and I made a quick trip to the washroom - we thought we should do that before people began to arrive. We left my husband alone and promised we would be right back. As we were leaving the washroom, an elderly woman entered, holding the door open to admit an even older woman, moving very slowly with the aid of a walker - neither of these women were known to me. The first woman asked me if I was there for Freda's funeral, and I said I was. She said she was concerned about her children who were driving to Montreal from Toronto, had I seen them yet? She was flustered, and she asked me to take care of her friend while she went to see if they had arrived. Without waiting for an answer, she left. I checked that the disabled stall was free, and I helped the second lady off with her coat. She moved slowly into the stall. I checked my watch. I realized that, unless Lady #1 returned, I would need to wait until Lady #2 was finished to help her with her coat, etc. I was concerned about leaving my husband, who has no brothers or sisters, to receive the mourners on his own, but I felt obliged to remain. And it soon became clear that she needed even more assistance from me. As I helped this stranger with her undergarments, I found myself becoming furious at Lady #1. How dare she burden me with this woman, when my place was by my husband helping him? All the while Lady #2 was telling me I was a nice lady, a good lady, to help her. I made meaningless replies. "It's my pleasure," I said, checking my watch surreptitiously. She needed a new pair of Depends. I got one out of her bag and looked for a place to dispose of the old ones. "Again I'll say you're a nice lady." Anyone would help, I said, deflecting her thanks. "Don't say that," she replied, "they wouldn't. I'll tell you one thing: Freda would have helped." It stopped me in my tracks; I felt humbled and grateful for the comparison, and guilty for my grudging heart. At that moment, nothing was more important to me than giving chesed, or lovingkindness, to this stranger. "How did you know Freda?" she asked. "I'm her daughter-in-law," I said, already in tears. "I should have known," she smiled at me. As I was helping her out of the stall, Lady #1 returned to claim her friend and I rushed to return to my husband. While I smile now at the odd situation I found myself in, I am so grateful to have had the opportunity to perform that small mitzvah, and the fact that a stranger deemed me worthy of being classed with my dear Freda, may she rest in peace, will always be a great comfort to me.
My next post - soon - will be about the quiltalong. And if it is ever good weather again, I will show you photos of the completed Miss March, which is as beautiful as any centrefold!
But it was not the only silver anniversary that I celebrated that day. I also marked the twenty-fifth anniversary of my relationship with this woman, shown here on her wedding day in 1948. My mother-in-law, Freda. A widow for 23 years, Freda was greatly loved by all her knew her. She was a tiny woman, probably 90 lbs soaking wet, but full of life and always youthful in her outlook and understanding, a model of generosity and compassion.
Freda passed away a few days ago, at the age of 84. I mention this on my blog because I want to tell two stories. The first story is more on the order of a public service announcement. Freda ended up in hospital because we observed in her an extremely rapid cognitive decline. Ten weeks ago, she was a woman who was living alone, driving, managing capably in an independent capacity, maintaining active friendships, and with sharp awareness of world events, current movies, etc. Over that time, she showed increasingly accelerated confusion, with memory loss and anxiety. She forgot how to work her radio and television. She could not remember what her medications were. She repeated herself over and over. Of course, we thought it was Alzheimers or another kind of dementia. Now, although age-related dementia is not uncommon in the elderly, it does not typically progress with such speed. I won't tell you all the ins and outs of our medical odyssey, but to say this: a week ago yesterday we took her to emergency, and the result of their assessments showed that her sodium and potassium levels were very low. Apparently her blood pressure medication, hydrochlorothiazide, had leached these chemicals from her blood. And one consequence of low sodium can be cognitive impairment. As they adjusted the sodium and potassium levels, we saw our dear mother, mother-in-law and grandmother begin to return to us, and we saw her personality and spirit return. Alas, other medical issues coalesced to cause her to falter and fail, and we lost her. I am not a medical doctor, so any advice I give on this topic is worth as much as any other rambling on the internet, but I will say this anyway: what I learned from this is that old age may cause mental decline, but mental decline is not necessarily due to simple old age, and I would urge those of you with elderly parents to keep this in mind and keep an eye on their blood pressure meds.
When I re-started my quilting career after my 15 year hiatus, the first thing I did was to finish a project my mother had left in progress when she passed in 2008. The second thing I did was make this lap quilt for Freda. Here she is when I gave it to her. She loved bright colours.
The second story I want to tell is about something that happened at her funeral on Sunday. Shortly before the actual service, my daughter and I made a quick trip to the washroom - we thought we should do that before people began to arrive. We left my husband alone and promised we would be right back. As we were leaving the washroom, an elderly woman entered, holding the door open to admit an even older woman, moving very slowly with the aid of a walker - neither of these women were known to me. The first woman asked me if I was there for Freda's funeral, and I said I was. She said she was concerned about her children who were driving to Montreal from Toronto, had I seen them yet? She was flustered, and she asked me to take care of her friend while she went to see if they had arrived. Without waiting for an answer, she left. I checked that the disabled stall was free, and I helped the second lady off with her coat. She moved slowly into the stall. I checked my watch. I realized that, unless Lady #1 returned, I would need to wait until Lady #2 was finished to help her with her coat, etc. I was concerned about leaving my husband, who has no brothers or sisters, to receive the mourners on his own, but I felt obliged to remain. And it soon became clear that she needed even more assistance from me. As I helped this stranger with her undergarments, I found myself becoming furious at Lady #1. How dare she burden me with this woman, when my place was by my husband helping him? All the while Lady #2 was telling me I was a nice lady, a good lady, to help her. I made meaningless replies. "It's my pleasure," I said, checking my watch surreptitiously. She needed a new pair of Depends. I got one out of her bag and looked for a place to dispose of the old ones. "Again I'll say you're a nice lady." Anyone would help, I said, deflecting her thanks. "Don't say that," she replied, "they wouldn't. I'll tell you one thing: Freda would have helped." It stopped me in my tracks; I felt humbled and grateful for the comparison, and guilty for my grudging heart. At that moment, nothing was more important to me than giving chesed, or lovingkindness, to this stranger. "How did you know Freda?" she asked. "I'm her daughter-in-law," I said, already in tears. "I should have known," she smiled at me. As I was helping her out of the stall, Lady #1 returned to claim her friend and I rushed to return to my husband. While I smile now at the odd situation I found myself in, I am so grateful to have had the opportunity to perform that small mitzvah, and the fact that a stranger deemed me worthy of being classed with my dear Freda, may she rest in peace, will always be a great comfort to me.
My next post - soon - will be about the quiltalong. And if it is ever good weather again, I will show you photos of the completed Miss March, which is as beautiful as any centrefold!