


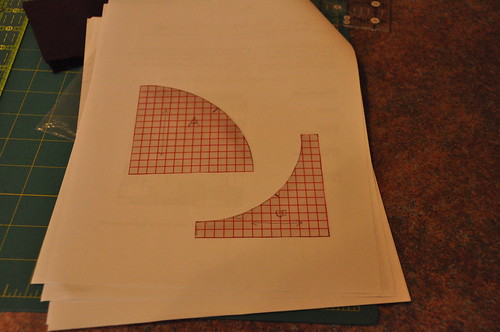
EDITED TO ADD: This is very important, folks! When you are printing your .pdf pattern, make sure it does not scale the pattern to fit the page (there is usually a check box asking if you want this in the printing process - on some printers it is the default to be selected. Deselect it, if this is the case for your printer.) Template A and Template B on the pattern must fit the small squares that you cut in step 3 below. If you do not follow these instructions, your A and B pieces will be too small!
It's a bit tricky; since this is a proprietary pattern, it would be very poor form for me to post photos that would make it possible for people to easily make he quilt without buying the pattern. So the photos I am showing here are necessarily a bit abbreviated, but I think they will help with the points I want to make.
First, I want to say that the instructions in Rebecca's pattern are very good, so if you follow them to the letter, you won't go wrong. However, you should know that this is definitely the time to apply the rule "measure twice, cut once". If you make a mistake in your cutting, and if you are cutting from fat quarters with no backup yardage, you are SOL. Not to scare you, or anything, ha ha. So in this post, I want to point out some things to look for so you don't go wrong.
1. As I said in a previous post, begin by measuring your FQs. Different shops are more or less generous in their cutting. A stingy FQ will be 18" on the short side. I am using a Kona solid bundle and these FQs are very stingy: not a hair over 18". This means I have very little scope for straightening up the cut, since the calculated waste on the 18" side is only 1/2". If you have more generous FQs, you can breathe a bit more freely.
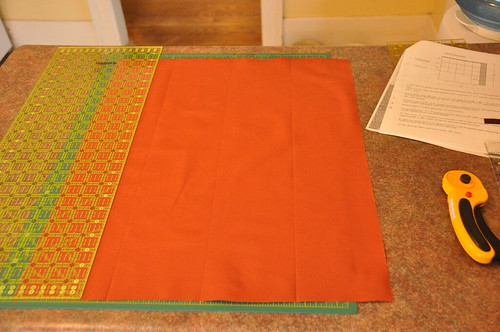
2. You want to begin by cutting 1 wide strip and 3 narrow strips from each FQ (the width dimensions of the strips are in the pattern). The FQ will be 18" x 20-22". Make sure you cut the strips so that they are 20-22" long. If you cut them 18" long you will not have enough fabric. In this picture I have the ruler along the 20" side.
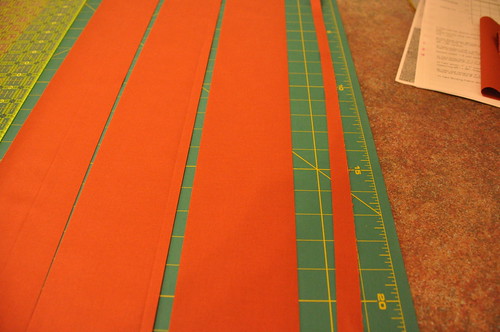
3. Subcut the strips into the pieces that are marked on the pattern. You will end up with 17 small squares and 2 large squares. Here you can see the waste from the 18" side when cutting the strips: that 1/2" strip on the right side of the cutting mat.
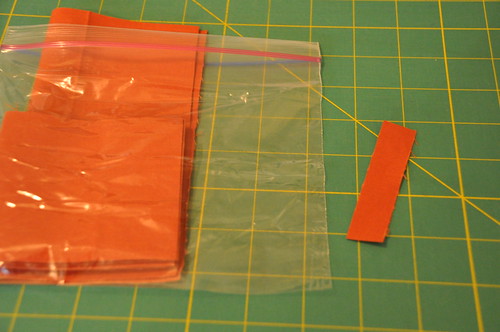
4. After I cut each FQ, I am keeping the pieces together in a plastic sandwich bag. (The reason I am doing this is that some of the Kona solids are very similar in colour, and I don't want to get them mixed up. If your fabrics aren't too similar, keeping them in separate bags isn't really necessary.) NOTE: From a piece of the waste fabric, cut a small swatch and keep it safe. You will use this when you are planning the layout of the quilt. This is not in the pattern, but it is something that I found extremely helpful when I made my first Ogee quilt, since I don't have a design wall that I can leave up for extended periods. Here you can see the the size of swatch I have preserved. I keep it in the plastic bag with the other pieces from the FQ.
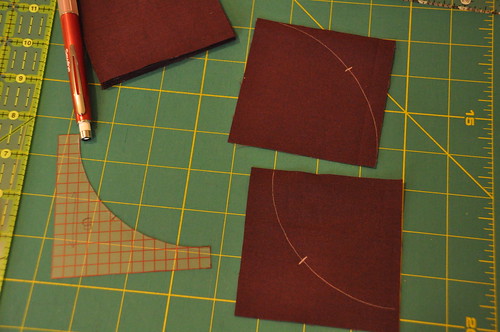
5. The pattern provides two templates for you to use to cut the curved pieces. I used some Dritz template plastic to trace the pattern pieces onto with a smudge-proof pen.
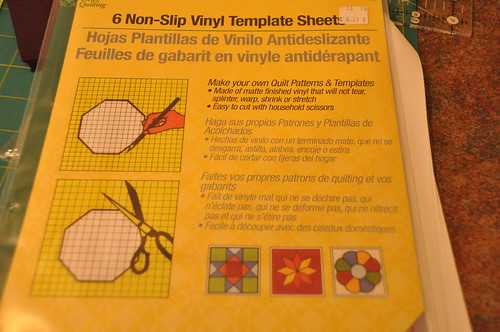
This plastic is fairly thick and I like it, but any reasonably stiff plastic or even cardboard can be used. When you cut the templates out, be sure and transfer the marks at the centre of the curve onto the template with a pen. Cut them carefully out with scissors.
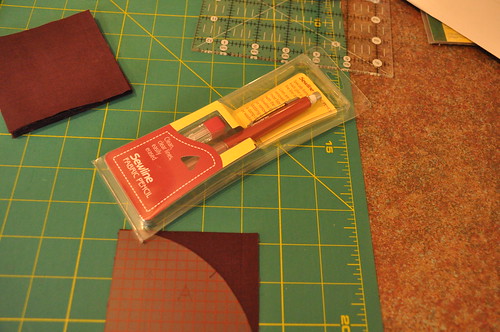
6. Fit one of the curved templates onto one of small squares that you cut from the FQ, and trace around with a sharp pencil. I used a regular mechanical pencil when I made my first Ogee quilt, but I am using this Sewline fabric pencil with white lead for this one, since so many of my fabrics are dark.
The pattern will tell you how many of Template A and Template B to cut from each FQ (see Step 3 on the pattern). Be sure and mark the centre point of the curve.
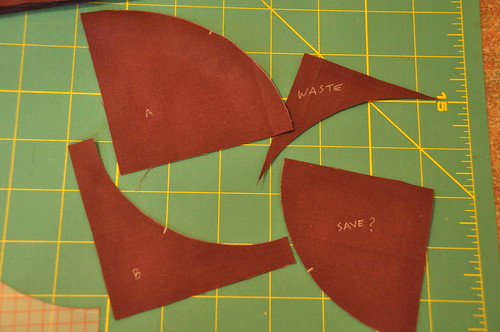
7. Cut along the marked line carefully. Here's what you will have after you have cut out one Template A and one Template B. I pitch the leftover from Template A (marked "Waste"). I save the segment that remains after cutting Template B - marked "Save?" - the question mark means that it's up to you to save or not. It is not required for the Ogee/Curlicue pattern, but I think you could probably do something interesting with them. You will have a lot of them when everything is cut out.
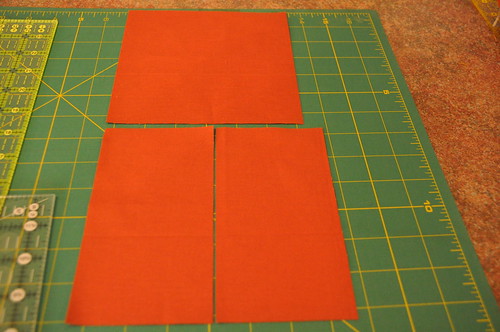
8. After your initial cutting of the strips into squares, you will have 2 large squares from each FQ. Since the pattern calls for 20 FQs, you will have 40 large squares in total. Pick 32 of these for the main ogees in the pattern. Step 4 of the pattern says to trim each of these 32 large squares down to slightly smaller squares (see the Step 4 of the pattern for the precise dimension). Of the remaining 8 large squares, pick one for your corners and set it aside. NOTE: This next bit is where I started off wrong when I made the pattern the first time. With the remaining 7 squares, trim ONE SIDE ONLY - the pattern will tell you how much (I went hog wild and continued to trim on both sides, because I didn't read the pattern carefully). At that point, cut that piece in half to form two equal rectangles (again, the precise dimensions are in Step 4 of the pattern). In the photo below, you can see what happens to the two large squares of a FQ: the one on top will be one of the 32 main ogees and has been trimmed to a slightly smaller square. The one on the bottom has been trimmed on one side only, and then bisected into two rectangles. The photo looks elongated because I was at an angle - sorry!
9. The last large square that you set aside in that FQ will be cut into four equal squares - the pattern will tell you the exact dimensions (see Step 6). These will be the corners of your quilt top. No photo for this step.
Done! Phew! Have fun cutting! And don't forget to post photos if you haven't already!
And if you aren't quilting along but you read through this entire post, here is your reward:


6 comments:
excellent video. :)
OMG, now I know why we need a week to get all the cutting done! Thank you for posting these instructions; I never would have thought about the direction of the cuts otherwise.
The video is so hilarious. I've never seen something like that before ;-D
Thank you for all these hints! I hope to pick some fabric and start cutting this weekend.
Oh, and I would have made the same mistake; trimming the last square in both directions instead of just one. Thanks for saving me some aggravation :-)
Too funny thanks for the laugh this morning!
Post a Comment
Thanks for dropping by - I'd love to hear what you think, so please leave me a comment!